How to create a Lesson using the Click to reveal Table Component?
Using this component, you can give a set of questions and one or two set of relevant answers. You can give one or two answers for the questions in columns which create a table.
You can create two types of Click to reveal Tables using this component.
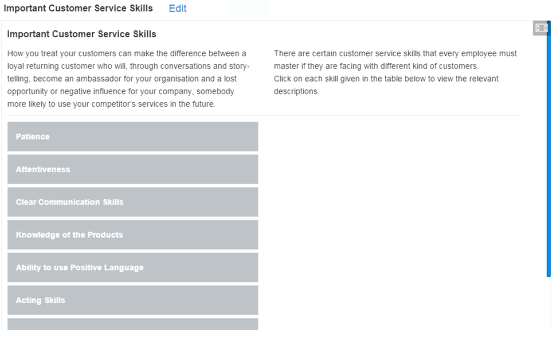
1. Click to reveal Table with one Column: In this type, when the user clicks on any row, the relevant answer appears on the right side as a new column. Only one answer is displayed.
2. Click to reveal Table with two Columns:
In this type, when user clicks on any row, the relevant two answers appear on the right side in two new columns. You can use this component when you have two possible answers for a question.
When to use this Component
You can use this component to create pages where you want to explain your lesson's questions and answers with tables in an interactive manner. Since the answer is revealed when the relevant question in a row is clicked, the students can easily understand and memorize the lessons.
How it works
-
The description and instruction text is given on the top of the page.
-
Click on question in any row to reveal the relevant answers on the right side as new columns.
-
Explore all the questions to reveal the relevant answers.
Features of this Component
-
You can create two types of Click to reveal Tables component using this component just by checking a checkbox.
-
You can easily switch between the two types of this component just by checking a checkbox.
-
You can place an optional heading for the page.
-
You can add as many as questions and answers as possible.
-
You can also add an optional divider between the text on top and the table.
You can create a page using this component by following the below steps.
Step 1: Go to the required Slide
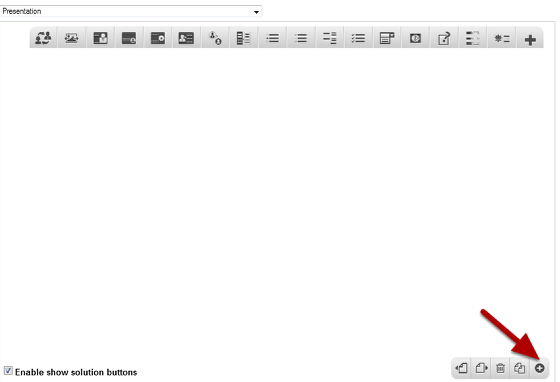
If you are creating a new Presentation, you will be taken to the first slide where you can use this component and create a page. Alternatively, if you want to add a new slide where you want to use this component, click on the '+' icon on the lower right corner as shown in the above image.
Step 2: Click on the Click to reveal Tables Component Icon

Then click on the Click to reveal Tables component icon as shown in the above image. You will see a screen similar to the image shown below.
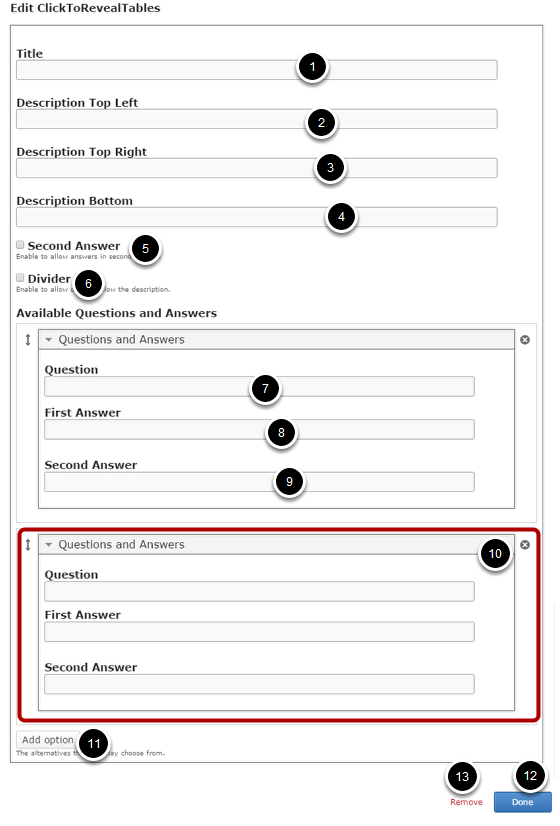
On this screen, you can
-
Add an optional title by typing it in the Title [1] field.
-
Add the description text on the Description Top Left [2], Description Top Right [3] and Description Bottom [4] fields.
-
Enable the answers in the second column by clicking the Second Answer [5] check box.
-
Add an optional divider below the description by clicking the Divider [6] check box.
-
Add Questions in Question [7] field under Questions and Answers title in the Available questions and Answers section.
-
Add answers in First Answer Text [8] and Second Answer [9] text fields.
-
Add more questions and answers by clicking on the Add option [11] button. By default, only two questions and answers are available.
-
Click on the Done [12] button to save the changes.
-
Remove the component by clicking the Remove [13] button.
Step 3: Add a Title (Optional)

Type the title of the page on the Title field as shown in the above image. You can also change the format of the title. This field is not mandatory, and if you don't enter a title, it won't be shown as an empty space on the page
Step 4: Add Description Top Left
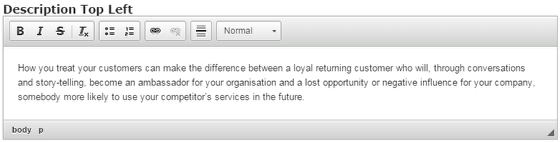
You can add contents to the Description Top Left field as shown in the above image. You can also change the format of the text, add and remove hyperlinks and insert horizontal lines between the contents. Please note that this field is mandatory.
Step 5: Add Description Top Right (Optional)
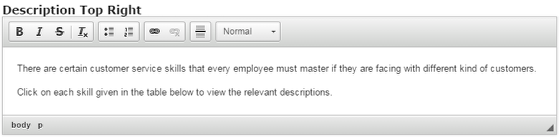
Type the contents of the page in the Description Top Right field as shown in the above image. You can also change the format of the text, add and remove hyperlinks and insert horizontal lines between the contents. Please note that this field is not mandatory as well.
Step 6: Add Description Bottom (Optional)
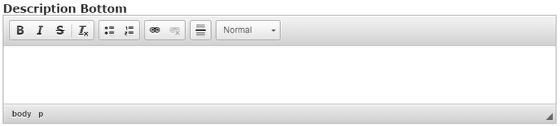
You can add any text to this field. You can also change the format of the text, add and remove hyperlinks and insert horizontal lines between the contents. This field is not mandatory as well.
Step 7: Enable Second Answer Checkbox

By clicking the Second Answer checkbox, you can add two relevant answers for each question. These answers will appear on the right side in two new columns. This option is optional, and so tick the checkbox if you need so.
Step 8: Enable Divider Checkbox (Optional)
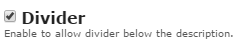
You can add an optional divider below the top description parts. If you want enable the divider, just check the Divider checkbox shown above. By default, it is disabled.
Step 9: Enter the Questions
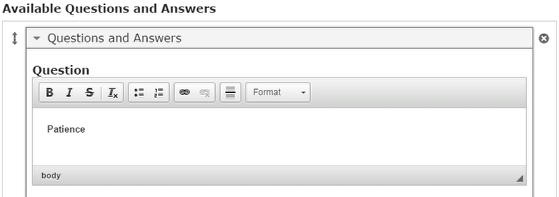
Under the Available Questions and answers heading, we can add questions. Start entering the question in the Question text fields. You can also change the format of the text, add and remove hyperlinks and insert horizontal lines between the contents. You should now have something like the above image.
Step 10: Enter the First Answer
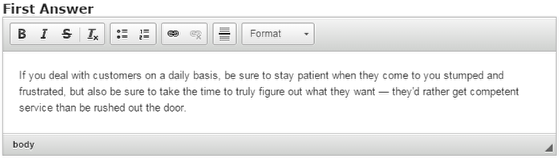
Under Available Questions and answers heading, we can add answers. Start entering the answer in the First Answer field. You can also change the format of the text, add and remove hyperlinks and insert horizontal lines between the contents. This field is mandatory.
Step 11: Add Second Answer (Optional)
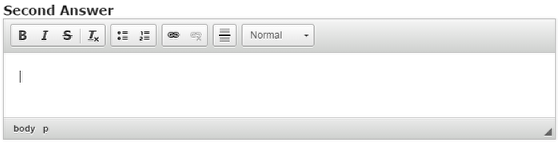
You can add answer in the second answer field as well. You can also change the format of the text, add and remove hyperlinks and insert horizontal lines between the contents. This is an optional field.
By default, there are only two questions and answers are available at the beginning. If you want to add another one, click the Add option [3] as shown in the below image.
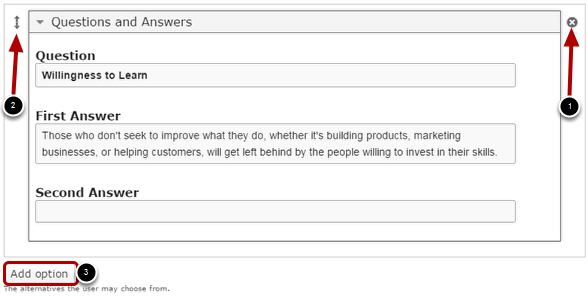
Another Question and Answer will be added after you click the Add option button. You can remove any answer by clicking the X [1] button on the top right corner of the Option window. You can also change the order of the answers by dragging the Double Headed Arrow [2] button on the top left corner of the Option window.
Step 12: Click the Done Button

Once you've updated all the details, click the Done [1] button shown above to complete editing the page. You can cancel creating the page just by clicking the Remove [2] button shown above. If you click the Done button, you will see the below screen with a preview of the created page.
Step 13: Click the Create Button

If you still want to edit the page, just double click on the preview page, and you will be taken to the Edit page. If you've done all the changes, you can click the Create button as shown above picture to finish editing the page.
You can see the finished page with a single answer column as shown in the above image.
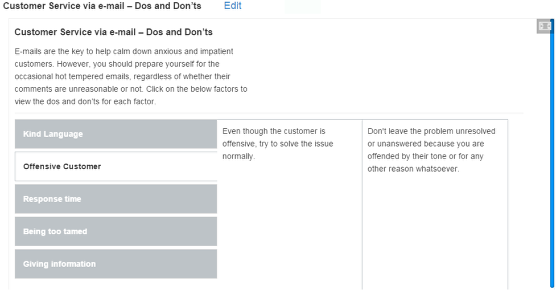
The abbove is a table with two answers for each question.
Notes
-
You can add as many questions as you need in a page using this component.
-
You can create as many pages as possible in a Presentation using this component.
-
If you enter answers for both columns and leave the Second Answer checkbox unchecked, only one column with the first answer will be shown.
-
If you’ve checked the Second Answer checkbox and haven’t entered any text for the Second Answer field, two columns will be shown, but the second column will be empty. So, it’s advised not to tick this checkbox when you have only one answer for the question.